Configuring the settings
Using the settings menus
You can view and change the I15 settings from the front panel, remote control, or using the Prisma app.
To display the settings menu
- Simultaneously press the
 and
and  buttons on the front panel, or press the MENU button on the remote control.
The settings menu is displayed:

To step between settings
- Press the or buttons on the front panel or remote control.
The current setting is shown highlighted.
To change a setting
- Press the SELECTOR button on the front panel or the SELECT button on the remote control.
The current value is shown highlighted.
- Press the or buttons on the front panel, or the or or
 or
or  buttons on the remote control, to change the value of the setting.
As you change it the new value is shown in the menu.
- Press the SELECTOR button on the front panel or the SELECT button on the remote control to save the value you have set.
To navigate back or cancel editing a setting
- Press and hold the SELECTOR button on the front panel, or press the
 button on the remote control.
To exit from the settings menu
- Simultaneously press the or buttons on the front panel, or press the MENU button on the remote control.
INPUT SETTINGS
The INPUT SETTINGS menu allows you to customise the inputs to suit the sources in your system:
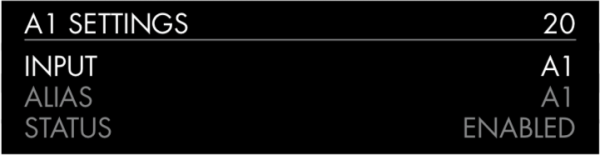
INPUT
Initially the INPUT SETTINGS shows the settings for the currently selected input. Alternatively the INPUT option allows you to step between all the inputs. The subsequent options will change according to the input.
ALIAS
Allows you to give the source a name; eg RADIO.
- Highlight the ALIAS item then press the SELECTOR button on the front panel, or the SELECT button on the remote control.
The RENAME INPUT menu is displayed:

- Press the or buttons on the front panel, or or buttons on the remote control, to select the first letter.
- Press the SELECTOR button on the front panel or the SELECT button on the remote control, to select it.
After adding each character you have the options:
ADD NEW CHARACTER
CONFIRM ‘A’
CLEAR ALIAS
where CONFIRM shows the alias you have entered so far.
- Select ADD NEW CHARACTER to add the remaining letters, up to a maximum of six characters.
- Select CONFIRM when you have entered the alias you want.
STATUS
Choose between ENABLED (default) or DISABLED to specify whether the input is enabled.
AUTO SENSE
Setting AUTO SENSE to SELECT allows you to specify that an input should be selected automatically when an audio signal starts on that input. To avoid unwanted switching between inputs due to gaps in the music, etc, the input must have previously been silent for at least a minute for a signal to select it.
Selecting WAKE+SELECT will also automatically wake the I15 from standby, if necessary. OFF (default) will disable automatic switching on that input.
While the SELECT option remains available, the WAKE+SELECT option is not available for the A1/Phono input if the MM15 phono preamplifier board is installed.
VOLUME
Choose between VARIABLE (default) or FIXED to specify whether the input should have variable or fixed gain.
FIXED is 0dB gain, equivalent to volume setting 66, and will overrule MAXIMUM VOLUME in AUDIO SETTINGS.
Selecting FIXED will show a loud-volume warning. Select YES to proceed or NO to cancel the fixed gain setting.
Fixed gain functions as an SSP (Surround Sound Pass-through) allowing the I15 to be used as an amplifier in a multi-channel system setup
INPUT GAIN
Choose between: -30dB to -1dB, 0dB (default), or +1dB to +30dB to set the gain for the selected input.
If the gain is set too high on an input clipping may occur.
If an input is set to VOLUME FIXED, the INPUT GAIN is fixed at 0dB, and will show FIXED in the INPUT GAIN setting.
AUDIO SETTINGS
The AUDIO SETTINGS menu allows you to customise the balance and start-up volume, and the maximum and mute volume.

BALANCE
Allows you to adjust the balance between 00LR-9 (far left), 00LR00 (centred, default) and -9LR00 (far right).
STARTUP VOLUME
Sets the general startup volume to between 0 and 60. The default is 20.
MAXIMUM VOLUME
Set maximum volume limit between 0 and 99. The default is 99.
MUTE VOLUME
Sets the volume when unit is muted. You can choose between 0 (default) and 30.
If the current volume is lower than the specified MUTE VOLUME, the volume will be set to 0 when pressing mute.
GENERAL SETTINGS
The GENERAL SETTINGS menu allows you to configure the general operation of the I15:

SHOW INPUTS
Choose between ALL (default), to show all inputs, or WITH SIGNAL, to show only inputs that have a signal.
FRONT PANEL
Choose LOCKED to lock the front panel buttons, or UNLOCKED (default) to use them.
To unlock the front panel buttons use the remote control to select this menu, or remove power from the I15 for a few seconds.
AUTO-DIM
Allows you to choose the delay for dimming the display after no user interaction, between: AFTER 1MIN, AFTER 5MIN, AFTER 10MIN (default), or OFF.
STANDBY SETTINGS
Displays the STANDBY SETTINGS menu to allow you to specify the standby settings.
AUTO-STANDBY automatically switches the I15 to standby if there is no user interaction or audio from the current source for a specified delay: AFTER 10MIN, AFTER 15MIN, AFTER 20MIN (default), or OFF.
FACTORY RESET
Resets the I15 to the factory default settings.
You are prompted to confirm. Select YES to proceed or NO to cancel.
FIRMWARE VERSIONS
Displays the FIRMWARE VERSIONS menu to allow you to view the versions of firmware installed.